

Thanks to modern technology, photographing the Earth and its atmospheric features is now easier than ever. Meteorologists and other scientists can capture different perspectives of scenes through aerial photography.
Aerial photography has been at the heart of fine imagery since the 19th century, when the first aerial photograph of a French village was taken.
So, are you an aerial photography enthusiast? Here are 12 tips you can use to improve your skills.
#1 Be Ready and Comfortable
Aerial photography can be fun for an enthusiast, but it is often a daunting task. There are many things you need to do to prepare. Whether you are using drones, planes, rockets, or satellites, you need to have everything set up.
Before taking off, you must first assess your work equipment to ensure everything is in order. This is a vital step to make sure all your safety gear is in place. Being prepared and comfortable not only helps you stay safe but also keeps you focused on the task at hand.
#2 Know the Timing
Knowing the right timing is essential to getting that incredible shot. As such, you should consider the golden hour and ensure you are ready when it arrives. The pre-sunset hour (around 18:20) and the period after dawn make for perfect golden hours for clear photographs. Everything on the Earth’s surface appears softer with enhanced colors, and the images are simply superb.
#3 Choose Your Aircraft
Drones are taking over as the most advanced aerial photography solution. However, if you want to feel part of the process and have some fun, an aircraft is the best choice. The most important factor is a clear view, and not every aircraft provides that.
You need an unobstructed view of the Earth’s surface, especially your target objects. Shooting from behind a window feels safe but will significantly undermine image quality and sharpness. Some aircraft models are specifically designed for aerial photography and have the doors removed to give you a clear view of the landscape. Others have windows that open from the bottom, providing an unobstructed view. The Cessna single-engine plane is excellent for its bottom window, which opens to a 60-degree angle, allowing your camera lens to shoot with zero obstruction.
#4 Choose the Right Camera
The camera is a major determinant of image quality. Manufacturers offer different models, so you need to know what is best for the task ahead. Aerial photographs are largely captured in motion, so you must tune the camera settings to deliver quality images even when the aircraft or drone is moving at top speeds.
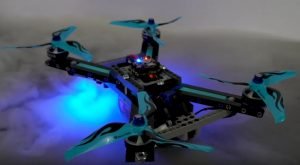
If you are using a drone, there are specific cameras designed for drones. Aim to get such models before embarking on your shoot. There are options for beginner camera drones that are cheaper and professional-grade camera drones that are more expensive.
In any case, the critical camera features you need to consider include:
The Resolution
Camera resolution refers to the number of pixels that its sensor can map. Resolution varies widely among cameras. Some have resolutions as low as 2 megapixels, while others can go up to 50 megapixels. Resolution determines the achievable Ground Sample Distance (GSD). Therefore, choosing a higher-resolution camera means you get a better GSD.
Higher-megapixel cameras are preferable, though a combination of factors is needed to get a clear and sharp image. For example, a high-resolution camera with a small sensor may not be ideal because the image could be susceptible to diffraction effects, thus undermining quality.
The Aperture
The aperture is the opening in the lens through which light enters the camera. It can be fixed or variable and is usually expressed in f-numbers to indicate the size of the opening. Cameras with fixed low-value apertures keep target objects that are several meters away in focus to infinity. This is useful, but low-resolution cameras may not be able to distinguish details if the target is too far away.
Variable apertures are preferable since they allow you to adjust the value to achieve the right lighting and sensor exposure for sharp images.
The Sensor Size
Sensors come in several sizes. You can have large or small sensors depending on your camera’s resolution. Larger sensors work best with high-resolution cameras because they have better light-gathering abilities. With a small sensor, you may need a longer exposure time to get clear images.
Shutter Speed
Aerial photography images are best taken with fast shutter speed cameras. A fast shutter helps keep the subject in focus while the aircraft is at high speed. However, you will need to compensate for the fast shutter speed with a low ISO speed.
The ISO Performance
ISO sensitivity is the camera feature that compensates for most other important adjustments needed for a sharp image. Camera adjustments are inevitable, especially during a long shoot.
For instance, when light levels drop during the sunset magic hour, you will likely need to make several adjustments to keep shooting. Also, the nature of aerial photography makes it essential to have a fast shutter speed to avoid blurred images, which forces you to keep the ISO speed low.
While playing with ISO settings helps you end up with softer images, you may experience the drawback of increased noise when you raise the speed. However, you can opt for full-frame cameras, which have better ISO performance. Choosing the latest full-frame camera model gives you confidence in its ISO capability, delivering clean images when combined with a suitable shutter speed.
#5 Choose the Ideal Lens
Choosing your lens should be guided by the type of images you want to shoot. You want to make the best use of your time in the skies, so you need a variety of versatile lenses. However, remember that the helicopter won’t stop to let you take your shot, so ensure you can change lenses reasonably quickly. There are different camera lens brands, and most offer similar experiences. Focal length is the usual basis for comparing lenses, but you can also consider it in terms of field of view.
You can also go for zoom lenses since they are excellent at bringing the subject into closer focus. A zoom lens that covers a focal length between 24mm and 105mm is ideal for aerial photography.
Aircraft may have vibrations, which can affect the quality of your shot. You can solve this with an image stabilization lens to keep your photos sharp. Some cameras can use lens hoods, but they are not a necessity. They are never guaranteed to work correctly, so it is often safer to remove them.
#6 Capture Your Subjects in Burst Mode
In aerial photography, subjects move quickly, especially if you are shooting from an aircraft or spacecraft. You could lose your target in the blink of an eye, so you need a way to shoot fast and capture a clean shot. Burst mode allows you to capture many images at the same time. You can review them later and select the best shots. Most cameras allow you to set the number of images you want to capture per burst.
#7 Shoot at Different Orientations
It’s easy to forget to change your camera’s position due to the excitement of being up there and admiring the landscape. You may end up with many similar photos, and a viewer wouldn’t enjoy hundreds of identical images. The main orientations are portrait (vertical) and landscape (horizontal).
Portrait shots are the most common, but don’t forget landscape orientation as well. Keep the purpose of your photos in mind, decide on the best orientation, and take more of those. However, you can still tilt the camera to different angles and shoot as many photos as possible.
#8 Safety Tether Your Equipment
Whether you are shooting from a helicopter, plane, satellite, or drone, it’s essential to keep your gear secure. Helicopters and planes are the most critical since equipment and parts can easily fall out.
The camera is the most sensitive accessory in your hands, so consider using a neck strap to ensure it won’t fall even if you accidentally let go. You can also have a camera bag to store other small tools. However, make sure you don’t leave the bag lying on the aircraft’s floor unattended. The aircraft’s vibrations can move it toward the bottom window or open doors.
It is also important to mind your own safety as much as you care about your work tools. If you are in an aircraft or helicopter with the doors off, be sure to wear a seatbelt. You can bend over to achieve certain angles as you capture images, but always be careful not to lean too far.
Make sure any parts you attach to the camera fit tightly. The wind is blowing against you, and your camera plus the aircraft wings are still in motion, so ensure nothing could fall.
If you are using drones, fix the cameras tightly as recommended and ensure nothing undermines the field of view. Test the drone and camera before final takeoff to see how they perform together.
### #9 Dress for Easy Mobility
You may need to try different angles depending on the location of your target subject. The cold and wind up there may force you to dress warmly, but it can be challenging to achieve certain angles while heavily dressed. Avoid bulky clothing and look for fitted wear that still keeps you warm.
It’s important to have safety straps, headgear, and other equipment for aerial work, but ensure they don’t get in your way. Make sure the camera straps don’t catch on the walls of the aircraft and that your arms can move freely.
#10 Change the Altitude
Everything on the ground looks beautiful when you are up there. Taking pictures at high altitudes can be a great idea since your images will reveal much more. However, sometimes you only need to come down a few hundred feet to get the clear view you have been waiting to see. If you are using a plane or helicopter, talk to your pilot about descending, and you will likely notice a dramatic change.
You can also change your drone’s altitude to come closer to the ground and see whether there are improvements in image detail and sharpness. This works out perfectly, especially if you want to isolate a few features surrounding your subject.
#11 Keep Shooting
It took an investment of money and time to be on that helicopter or to get that drone a thousand feet high. Therefore, use the time you have for the sole purpose of taking pictures. It may be tempting to start reviewing your photos, but don’t fall for it. You will have plenty of time once the session comes to an end.
Also, this is not the time to admire the landscape, watch boats on the ocean, or try to find your favorite basketball pitch. If anything, you can take another flight for that purpose another time.
#12 Have Backup Memory
It can be frustrating if you cannot take any more images because your memory is full. Make storage space a top priority when choosing a camera, and go for one with as much as a terabyte of capacity. High-resolution pictures take up a lot of space, so no matter how large your camera’s built-in storage is, ensure you have a backup. You can find large SD cards that you can swap in quickly and keep shooting.
Conclusion
If you made it this far, chances are we share a passion for photography. Did you learn something new from our aerial photography list post? We all rise to the task with the expectation of serving our clients with great images, so following these tips can be quite helpful.
Feel free to add your views in the comment section below and share this article for other aerial photography enthusiasts to read.